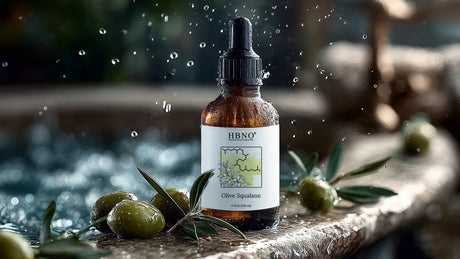
Olive oil has been a staple in kitchens, medicine cabinets, and beauty regimens for centuries. Its versatility and numerous health benefits make it one of the most revered oils in the world. While most people are familiar with olive oil's culinary uses, many might not realize its significant role in soap making. In fact, olive oil, particularly Olive Carrier Oil Virgin Organic and Virgin Organic Carrier Oil, is one of the most popular oils used to make soap due to its nourishing, hydrating, and healing properties.
In this blog post, we will explore why olive oil is a favorite in the soap-making community, its benefits for the skin, how to use it in your soap, and a detailed guide on how to create your very own olive oil soap.
Understanding Olive Oil in Soap Making
Olive oil is a versatile, natural ingredient that can be incorporated into almost any skin care or beauty routine. In soap making, it acts as the main base oil, providing several important benefits. When mixed with lye (sodium hydroxide), olive oil undergoes a chemical reaction called saponification, which transforms it into soap.
The reason why Virgin Organic Carrier Oil and Olive Carrier Oil Virgin Organic are popular in soap making is that these oils retain the maximum amount of beneficial nutrients, antioxidants, and vitamins. These qualities make olive oil an exceptional ingredient for soaps that are both luxurious and functional.
Benefits of Using Olive Oil in Soap Making
There are numerous reasons why olive oil is such a highly sought-after ingredient in soap making, including:
- Moisturizing Qualities: Olive oil is a natural humectant, which means it attracts and retains moisture in the skin. This is especially beneficial for those with dry or sensitive skin.
- Rich in Antioxidants: Extra virgin organic olive oil is packed with antioxidants like vitamins A and E, which help protect the skin from the damaging effects of free radicals, reduce inflammation, and slow down the aging process.
- Mild Cleansing Action: Olive oil is gentle on the skin, offering a mild cleansing action without stripping the skin of its natural oils. This makes it ideal for those with sensitive skin or conditions like eczema.
- Nutrient-Rich: Olive oil contains a range of nutrients, including squalene and polyphenols, that nourish the skin. These compounds help keep the skin soft, hydrated, and smooth.
- Anti-inflammatory Properties: Olive oil helps soothe irritated or inflamed skin, making it great for people with sensitive skin or conditions like rosacea or acne.
- Creates a Creamy Lather: When mixed with other oils like coconut oil or palm oil, olive oil can help create a smooth, creamy lather, which is a hallmark of high-quality soap.
- Non-comedogenic: Olive oil is non-comedogenic, meaning it doesn't clog pores, which is an essential feature for anyone concerned with acne-prone skin.
Different Types of Olive Oil for Soap Making
When it comes to soap making, choosing the right type of olive oil is essential for achieving the desired characteristics in your soap. Here are the different types of olive oil commonly used in soap making:
- Extra Virgin Olive Oil: This is the highest quality olive oil, made by cold-pressing the olives. It is unrefined, so it retains all of its natural nutrients, antioxidants, and vitamins. Extra virgin olive oil provides the most beneficial properties for skin, making it the ideal choice for soap making.
- Virgin Olive Oil: Slightly less refined than extra virgin olive oil, virgin olive oil has a bit more acidity but still offers many of the same benefits. It is a great option if you're looking for a more budget-friendly alternative.
- Refined Olive Oil: This type of olive oil undergoes a refining process that strips it of its natural color, scent, and some of its beneficial nutrients. While still usable in soap making, it is less ideal than extra virgin or virgin olive oil because it lacks some of the key antioxidants and nutrients that give olive oil its skin benefits.
- Olive Pomace Oil: This oil is extracted from the leftover pulp after the first cold-pressing process. It is more affordable than extra virgin or virgin olive oil and can still be used in soap making, though it may not offer the same skin benefits or the same quality of lather.
Olive Oil Soap: Uses in Daily Skin Care
Making soap with Olive Carrier Oil Virgin Organic or Virgin Organic Carrier Oil is a great way to create a product that is nourishing and gentle on the skin. Here are a few ways in which olive oil soap can benefit your daily skincare routine:
- Facial Soap: Olive oil soap is often used as a facial cleanser due to its gentle nature. It cleans without irritating or drying out the skin, making it suitable for sensitive or acne-prone skin.
- Body Soap: Olive oil soap is excellent for body washing, providing moisture and relief for dry skin. It's a fantastic option for those with eczema, psoriasis, or other skin conditions.
- Shaving Soap: Olive oil's smooth and creamy texture makes it an excellent choice for shaving soaps. It allows razors to glide easily, reducing the risk of nicks and cuts.
- Hand Soap: If you want to keep your hands soft and moisturized after frequent washing, olive oil soap is an ideal choice. It cleans without stripping the skin's natural oils.
- Hair Care: Olive oil soap can be used as a shampoo bar for dry or damaged hair. It can nourish the scalp and improve hair health over time.

How to Make Olive Oil Soap: A Step-by-Step Guide
Now that we've covered why olive oil is so beneficial for soap making, let's go over how you can make your very own homemade olive oil soap. The process is relatively simple, though it does require some care and attention.
Ingredients:
- 16 oz (454 g) Extra Virgin Organic Olive Oil (for a luxurious soap that's rich in antioxidants and moisturizing benefits)
- 2.1 oz (60 g) Lye (Sodium Hydroxide - a necessary ingredient for saponification)
- 6 oz (170 g) Distilled Water (used to dissolve the lye)
- Optional: Essential Oils for fragrance (like lavender, peppermint, or eucalyptus)
- Optional: Herbs for exfoliation (like rosemary, chamomile, or lavender buds)
Instructions:
1. Prepare Your Workspace: Soap making requires precision and care. Start by clearing your workspace and gathering all necessary equipment. Make sure you have gloves, goggles, and protective gear to handle the lye safely.
2. Measure the Ingredients: Use a kitchen scale to weigh out your ingredients. Accuracy is crucial, especially when measuring the lye, as too much lye can make the soap too harsh.
3. Mix the Lye Solution: Slowly add the lye to the distilled water in a heat-resistant glass container (NEVER add water to lye). Stir gently with a wooden spoon until the lye dissolves completely. The solution will heat up as the lye dissolves, so allow it to cool to around 100°F (38°C).
4. Heat the Olive Oil: While the lye solution is cooling, gently heat the olive oil to around 100°F (38°C) in a large pot or double boiler. This ensures that the olive oil blends well with the lye solution.
5. Combine the Lye and Olive Oil: Once both the lye solution and the olive oil have cooled to the right temperature, slowly pour the lye solution into the olive oil while stirring gently.
6. Blend to Trace: Using an immersion blender, blend the mixture until it thickens to a "trace" stage. Trace is when the soap mixture leaves a light trail on the surface as you drizzle it. This typically takes 4-6 minutes of blending.
7. Pour into Molds: Once trace is achieved, pour the soap mixture into your soap molds. Smooth the top with a spatula and add any optional ingredients such as essential oils, herbs, or exfoliants.
8. Cure the Soap: Cover the soap with a towel or plastic wrap and allow it to set for 24-48 hours. After it firms up, remove it from the molds and cut into bars. Place the bars in a dry, cool area for 4-6 weeks to allow the soap to cure properly. This helps the soap harden and ensures it's safe for use.
Tips for Making the Best Olive Oil Soap:
- Patience is Key: Olive oil soap takes longer to saponify compared to other oils. Be patient during the curing process to ensure the soap is well-formed and effective.
- Use a Soap Calculator: When making soap with oils, it's helpful to use an online soap calculator to determine the right amounts of lye and water.
- Avoid Overheating: Do not overheat the olive oil, as high temperatures can destroy its beneficial compounds. Stick to a gentle, low heat when warming the oil.
- Experiment with Scents: Add essential oils to create a custom fragrance, such as lavender for relaxation or peppermint for invigoration.
- Customizing Your Soap: Feel free to get creative with ingredients. You can add dried herbs, oatmeal, or honey to enhance your soap's texture and properties.
Conclusion
Making soap with Virgin Organic Carrier Oil or Organic Extra Virgin Olive Carrier Oil is a wonderful way to nourish your skin and avoid harsh chemicals. Olive oil's natural moisturizing properties, combined with its antioxidant and anti-inflammatory benefits, make it a perfect choice for those looking to create luxurious, skin-friendly soap at home.
By following the simple steps outlined in this guide and experimenting with different additions, you can create custom soaps that are perfect for your skin care needs. Whether you're making soap for personal use or starting a small business, olive oil soap is a fantastic product that is sure to appeal to anyone who cares about natural, wholesome skincare. Partner with the Private Label Product Partner known for exceptional quality and customization.